Today we will use the time to make sure we are current on all our work. I will facilitate around the room to help you all individually. All instructions for for all the assignments are listed at the bottom of the blog page.
Monday, March 25, 2013
Get Caught Up Day
Today we will use the time to make sure we are current on all our work. I will facilitate around the room to help you all individually. All instructions for for all the assignments are listed at the bottom of the blog page.
Tuesday, March 19, 2013
Movie Maker - My Favorites Video

Click on the image or the link for the assignment along with Rubric
Go over your EduBlogs.Org to make sure everything has been completed and posted.
ALL PAINT.NET ASSIGNMENTS MUST BE COMPLETED AND POSTED BY FRIDAY MARCH 22ND.
Wednesday, March 13, 2013
Movie Maker - Lyrics Video
This project is designed to provide entry-level video editing using Windows
Movie Maker on a PC. In this project, students will use Windows Movie Maker to
edit and export a short video. Windows Movie Maker is a free video editing
software from Microsoft, which comes preloaded on all PC’s with Windows XP.
Click on links to view some lyric video samples:
Tasks:
1. Go to www.AZLYRICS.com
2. Find the lyrics to the song of your choice (use your best judgement - remember no vulgar language)
3. Copy the lyrics from www.azlyrics.com and paste them into a Micrsoft document. (CTRL+A then CTRL+C)
4. Save the Lyrics in your Tech 7 folder and title it the name of the song.
5. Go over your EduBlogs.Org to make sure everything has been completed and posted.
ALL PAINT.NET ASSIGNMENTS MUST BE COMPLETED AND POSTED BY FRIDAY MARCH 22ND.
Tuesday, March 12, 2013
Paint.Net: Replace Color (Andy Warhol Grid)
6.RST.3 - Follow precisely a multistep procedure when
carrying out experiments, taking measurements, or performing technical tasks.
6.RST.7 - Integrate quantitative or technical information
expressed in words in a text with
a version of that information expressed visually (e.g., in a flowchart, diagram, model, graph, or table)
a version of that information expressed visually (e.g., in a flowchart, diagram, model, graph, or table)
Today we will play with the Hue/Saturation Adjustments tool to
“Replace Color" and create an Andy Warhol Grid.
Step I: Getting Started
Step I: Getting Started
- Click on one of the sample images below to view it full screen
2. Copy the image
(Right Click>Save Picture As)
3. Open Paint.Net
and create a New Document
4. Go To EDIT> Paste As New Layer
Step II: Making a "Warhol Grid"
- Go to IMAGE > CANVAS SIZE
- Change by “Absolute Size” to by “Percentage"
- Change the percentage to 200% [percent].
4. Click
the "Upper-Left" Arrow
5. Click
OK
6. Paste
another copy of your picture
Edit>Past in to New Layer
Edit>Past in to New Layer
7. Go
to ADJUSTMENTS > Hue / Saturation
8. Use the Hue / Saturation tool
to select the one of the bright colors
9. Use
the arrow to drag the picture to the upper-right corner.
10. Paste another copy of your picture
11. Repeat Steps 7 & 8
10. Paste another copy of your picture
11. Repeat Steps 7 & 8
12.Use
the arrow to drag the picture to the lower-left corner
13.Paste another copy of your picture Repeat Steps 7 & 8
14.Use the arrow to drag the picture to the lower-right corner.
13.Paste another copy of your picture Repeat Steps 7 & 8
14.Use the arrow to drag the picture to the lower-right corner.
Step III: Finishing
1.Save
your image to your Portfolio folder in My Documents as a .JPG title it Warhol
Grid.
2. Log in
to your blog www.Edublogs.org page
3. Create
a New Post and insert your JPG picture
4. Write
a quick summary of the project and what you did to get the look you came
up with
Monday, March 4, 2013
Paint.Net: Veggie Head
7.RST.3 - Follow precisely a multistep
procedure when carrying out experiments, taking measurements, or
performing technical tasks.
7.RST.7 - Integrate quantitative or
technical information expressed in words in a text with a version of
that information expressed visually (e.g., in a flowchart, diagram,
model, graph, or table)
7.RST.3 - Follow precisely a multistep
procedure when carrying out experiments, taking measurements, or
performing technical tasks.
Today we will use some of the basic Paint.Net tools and concepts, and then create a Veggie Head. The Veggie Head project is a classic Photoshop tutorial which teaches you how to use a variety of tools and techniques to accomplish a seemingly easy task.
The task for today:
- Right-click on the image below of the watermelon or Cantaloupe to use as the head and SELECT "Copy Image" (or "Copy Picture" depending on your browser)
- Open Paint.Net
- Go to FILE > NEW
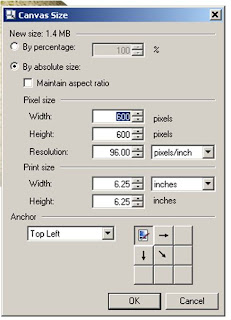
- Go to IMAGE>CANVAS SIZE and set the Width and Height to 600 and Click OK
- Go to EDIT > PASTE (you should now see the Watermelon or Cantaloupe as your 1st Layer on the White Background
- Your task is to take the various pieces, copy them, paste them, and clean them up to create a "Veggie Head". Some examples can be seen below:
7. Use some of the images listed below as well to enhance your Veggie Head:
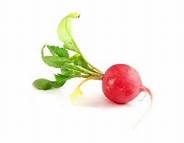
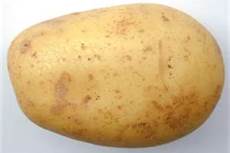
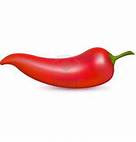
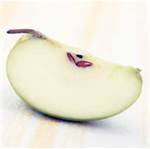
8. Be sure to save the file as Veggie Head.pdn and save again as Veggie Head.jpeg
Subscribe to:
Comments (Atom)


